Pages

Wednesday 4 January 2017

New Year, happy may it be!

Since my last post, which spelled a disaster for my camera, I have managed to find out how to link my Instagram photos to my computer. Which was just as well because I dropped my camera and broke the lens.

I also messed up my sewing machine sewing a sequin dress. Now I have a sparkly, new sewing machine too. A new year and a new me with new gadgets!

I've reopened both my Etsy store and Folksy shop and am starting to fill them up with winter warmers in the shape of shawl, cowls and scarves. As a preview of things to come here are a few of my favourite things.

I love triangle shawls and these are in both Etsy and Folksy


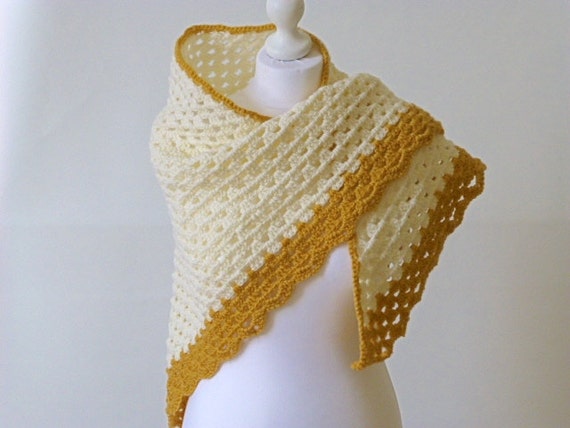
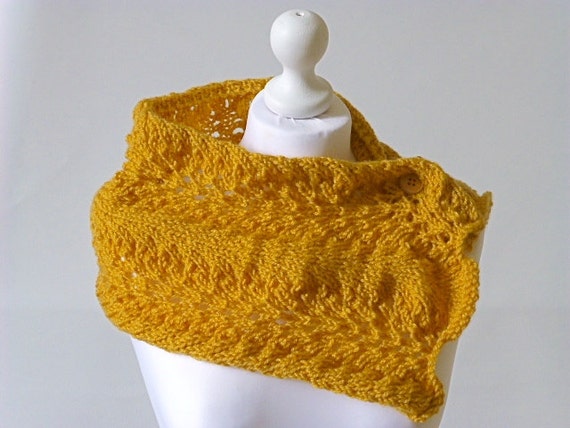
I've also knitted my favourite feather and fan stitch to make a few adjustable cowls. As you can see I've got a thing about mustard and cream right now.

Sunday 2 October 2016

October

Another month but I'm not letting this one do by without doing something constructive. I've decided to take part in an Instagram crochet hook up run by @lazydaisyjones

1 October: Yarn Selfie.

Sparing everyone the horror of a real selfie, this is my lion faced pincushion.

If only somebody could explain how to get photos from my phone on to Blogger my life would be easier.


Saturday 21 November 2015

Quick fix cat toy

If like me you've got multiple ends of yarn that are just too small to justify keeping, here's a tip.

My cat Posie is very laid back but even she gets fed up on these wet, cold, winter days. She will leave my yarn alone but I have made her round toys in the past. I've been so busy lately that I haven't got the time to crochet another thing. Hence I have a limitless supply of yarn ends.

Take a section and tie the ends together.


Scrunch them up. With the end of the yarn ball knot it around to make sure all the ends are safe.


Here's Posie checking one I made earlier before picking it up in her mouth and running away with it.
No better endorsment than that!


Wednesday 26 August 2015

Granny Square Tutorial

Lots of people that I know have started crochet and usually the first thing they want to make is a granny square. There are so many tutes out there on blogs and YouTube that give conflicting instructions. Believe me when I started I used so many different methods before developing my own.

I think the whole point of a square is that it should have corners. You can't have a good turn if you just use two chains. I always use three. I also put a chain before each treble cluster on the sides.

I also join the rounds with a treble instead of chains. This brings you up in the middle of the space you need to work in. No need for slip stitches.

These are the notes I've made for my workshop. Keep scrolling down for the picture tutorial and further still for the chart.


All Things Granny

Single colour Granny Square

I've used a standard double knit and a 4mm crochet hook.

Abbreviations for UK terms. For US terms substitute dc instead of treble.

ch  = chain
tr = treble
ss = slipstitch

In this pattern the stitches are worked in the spaces of the row beneath.

Foundation row: Ch5, join to 1st chain with a ss to form a ring.

Round 1: Ch3, (counts as first tr) 2tr in the ring, * 3ch, 3tr in ring* 3 times, tr to top of 1st ch3 (4 tr groups)

Round 2: ch3, 2tr in the same space, *1ch, 3tr, 3ch, 3tr in next ch3 space* 3 times, ch1, 3tr, in the next 3ch space, tr to the top of the 1st ch3 (8 tr groups)

Continue in this way. Remember to ch1 between the treble groups on the sides but ch3 between the treble groups in the corners.


Round 1
Make a slipknot, pull yarn through


  Chain 5.  Slipstitch to 1st chain to make a ring


 chain 3

Working the trebles in the ring, treble 2, chain 3


Treble 3, chain 3. Repeat until you have 4 treble groups.


To join, treble into the top of 1st  ch3 to close the round. Sometimes this is difficult to see if you're new to crochet and your tension is tight. I've place a blunt ended needle in the spot to show where to find it.

Handy hint - When you make your ch3 use a stitch maker in the third chain.
        

Round 2:

Chain 3

 Treble 2 in same space, chain 1


Now we're working in the next corner space.

Treble 3, chain 3, treble 3 in next space, chain 1


In last space, where you've already completed your first join;
Treble 3 join with treble in the top of 1st ch3


For your next round start with the ch3 and treble 2, ch1 and then treble 3 in the next ch1 space. After your treble cluster ch1.
Your corners will be exactly the same as you worked in the second round.

The chart shows two rounds only. The dot usually indicates a slip stitch but I've added it to show you where the joining treble goes.


Friday 12 June 2015

Pincushions galore!

Those that know me understand why I've been away for quite a while. At last I have my own place and my very own internet and can post whenever and whatever I like. Oh, the power!!

This week I've been busy listing some of the pincushions I made for my book, '50 Pincushions to Knit and Crochet'. Here's a sneak preview...


Flora was inspired by the colours of a Mexican fiesta. The little flowers around the side are in fact ric rac so just have to be stitched in place.


Water lily is a multi-petalled and multilayered flower pincushion. The flower floats on its own little ice blue pond.


Daisy has hand sewn flowers on top and bottom and again the flower ric rac adds an easy finishing touch.


Ammonite is my personal favourite in this group. I love spirals and this one has a layer of grey metallic thread. It reminds me of the rocks on the coast that often contain ammonites. Just like the ones that I borrowed from the garden wall.

Sunday 22 March 2015

A Quick Tutorial

If like me you have numerous USB leads then you share my frustration at finding the right one. I have two camera both with similar leads but with different connectors and when I'm in a rush I always mix them up. This short tutorial shows how you can save yourself more frustration.


All you need is the correct lead, a crochet hook and some spare yarn. I've used a 4mm hook and double knit yarn.


Start with a slip knit and place the hook on top of the cable.


Pull the yarn through to the front. Yarn over the hook and pull through the two loops on your hook.
You're making a double crochet or, if you're using American terms, a single crochet.


Carry on until you've added enough to differentiate between the cables.


Hopefully that's enough not to get them mixed up ever again!


Sunday 8 March 2015

Colour Inspiration


My new Blue Face Leicester, 4ply wool was customer dyed by Becky King. I love the gorgeous, jewel colours and can't wait to start knitting with them.

Becky is a joy to work with. Having only two photos to work with she's done an amazing job. I can't tell you the technical side of things but our inspiration for the colour combinations came from Design Seeds. The first is refreshing hues.


The second is tropical birds.


My photos don't do justice to the colours but it's murky and wet outside. Just the right weather to get out my pins and decide what to make with them.

Thanks Becky!